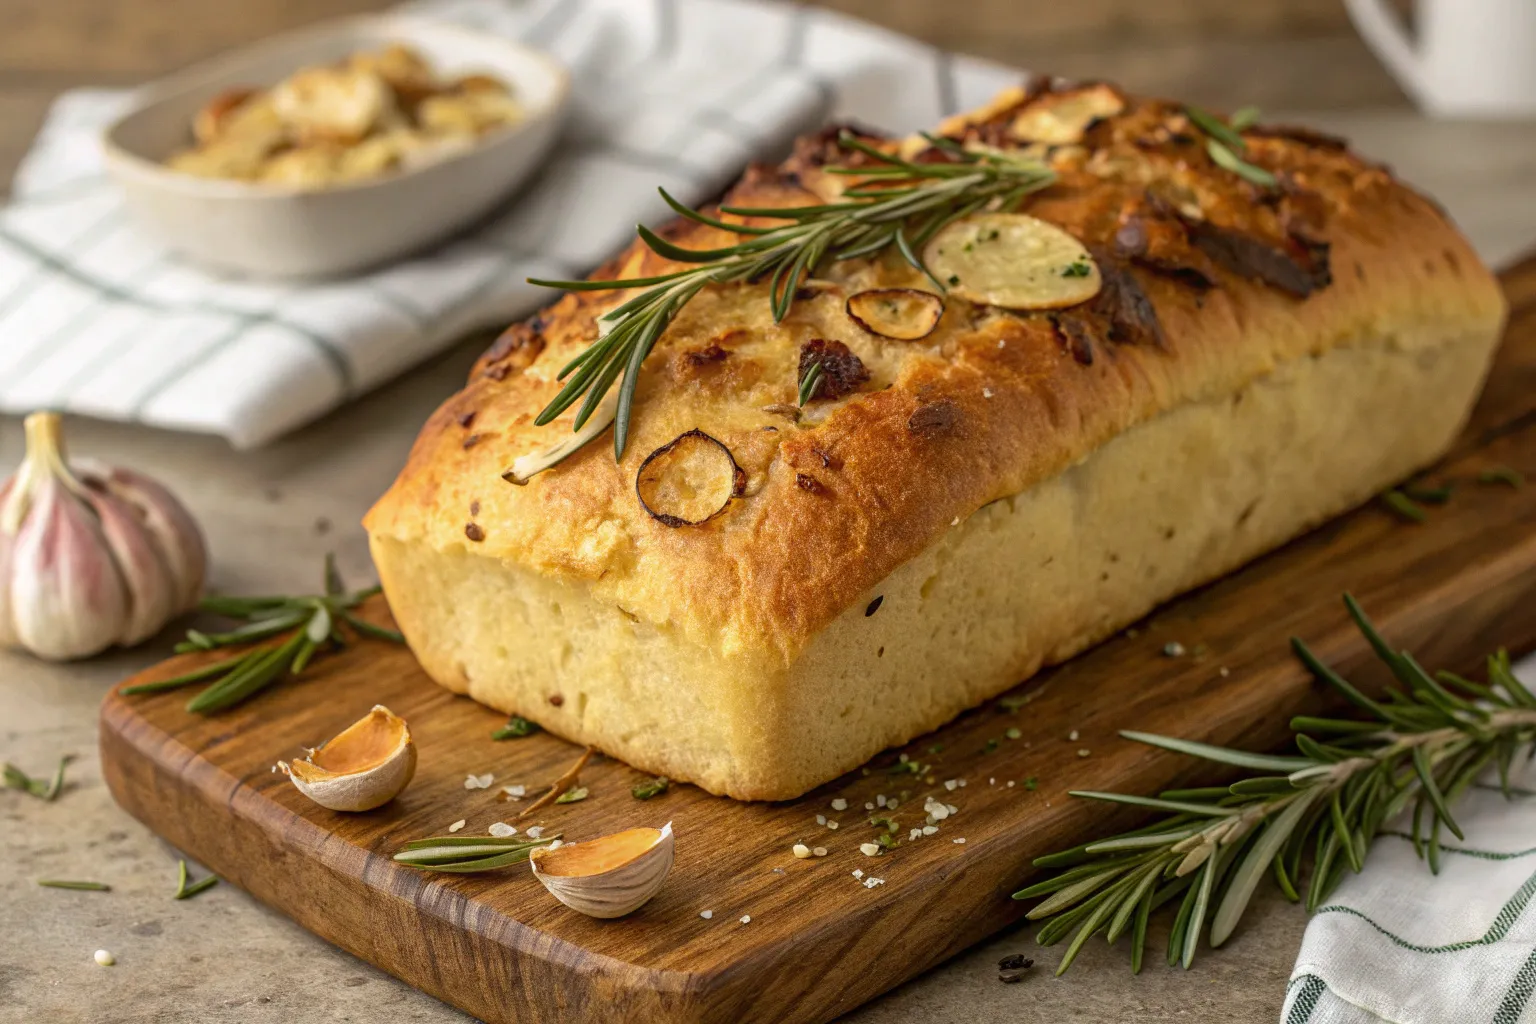
Imagine pulling a golden, crusty loaf of rustic homemade bread from your oven, filled with the intoxicating aroma of fresh rosemary and roasted garlic. No-knead rosemary garlic bread transforms home baking from a complex task into an accessible culinary adventure that anyone can master.
This simple technique revolutionizes bread making by eliminating the traditional kneading process. You’ll create an artisan-style loaf with minimal effort, maximum flavor, and a professional-quality result that will impress family and friends.
Baking bread at home isn’t just about nutrition—it’s about creating memories, filling your kitchen with warm scents, and enjoying a craft that connects you to generations of home cooks. With this no-knead rosemary garlic bread recipe, you’ll unlock the secrets to creating restaurant-quality bread in your own kitchen.
Key Takeaways
- Discover an effortless bread-making technique
- Create professional-quality bread with minimal skill
- Enjoy restaurant-style crust and flavor at home
- Impress guests with aromatic rosemary and garlic
- Transform simple ingredients into extraordinary bread
The Magic Behind No-Knead Bread Making
Discovering the secrets of an easy no-knead bread recipe transforms home baking from a complex art to a simple joy. The magic lies in understanding the science behind bread making that requires minimal effort but delivers maximum flavor.
Bread making isn’t about muscle power—it’s about patience and chemical reactions. Your crusty dutch oven bread develops through a fascinating process of slow fermentation that breaks down complex flour proteins naturally.
Understanding the Science of Slow Fermentation
Slow fermentation is the hidden superpower of no-knead bread techniques. During this process, yeast and bacteria work together to:
- Develop complex flavor profiles
- Break down gluten structures
- Create soft, airy bread texture
- Improve digestibility of wheat proteins
Why Dutch Oven Baking Works Best
A Dutch oven creates the perfect environment for baking artisan-style bread. Its thick walls trap steam, which is crucial for developing a crispy, golden crust that home bakers dream about.
The Role of Time in Flavor Development
Time is your most important ingredient in creating a stellar bread. Longer fermentation allows enzymes to break down starches, creating deeper, more nuanced flavors that simply can’t be rushed.
By embracing these principles, you’ll transform your bread making from a daunting task to an enjoyable, foolproof experience that produces professional-quality results every single time.
Essential Ingredients for Perfect Rustic No-Knead Rosemary Garlic Bread
Creating a delicious garlic rosemary artisan bread starts with selecting the right ingredients. Your savory no-knead bread foundation depends on high-quality components that work together to develop rich flavors and perfect texture.
For your rustic bread, you’ll want to focus on these key ingredients:
- Flour: Choose unbleached bread flour with high protein content for the best structure
- Yeast: Active dry or instant yeast provides the essential rise
- Salt: Kosher or sea salt enhances overall flavor profile
- Water: Filtered water helps create consistent dough hydration
The magic of garlic rosemary artisan bread lies in its aromatic ingredients. Fresh rosemary brings an earthy, pine-like flavor that transforms your savory no-knead bread from ordinary to extraordinary. When selecting garlic, opt for fresh cloves to maximize the bread’s robust taste.
“The quality of ingredients determines the soul of your bread” – Artisan Baking Wisdom
Consider these pro tips when gathering your ingredients:
- Use room temperature ingredients for better mixing
- Select organic herbs for more intense flavor
- Ensure all ingredients are fresh and high-quality
Your commitment to selecting premium ingredients will transform a simple recipe into an exceptional culinary experience.
Equipment You’ll Need for Artisan Bread Success
Creating crusty dutch oven bread at home requires the right equipment. Your rustic homemade bread journey starts with gathering essential tools that transform simple ingredients into artisan-quality loaves. From mixing to baking, each piece of equipment plays a crucial role in bread-making success.
Choosing the Right Dutch Oven
Your dutch oven is the star player in creating that perfect crusty exterior. Consider these key features when selecting:
- Cast iron for optimal heat retention
- Minimum 4-5 quart capacity
- Oven-safe lid with tight seal
- Enameled surface for easy cleaning
| Dutch Oven Type | Pros | Best For |
|---|---|---|
| Cast Iron | Excellent heat distribution | Professional-style rustic homemade bread |
| Ceramic | Even heating, attractive design | Home bakers wanting aesthetics |
| Enameled | Easy maintenance | Beginner bread makers |
Additional Tools and Supplies
Complement your dutch oven with these essential bread-making tools:
- Large mixing bowl
- Kitchen scale
- Bench scraper
- Proofing basket
- Sharp bread lame or razor blade
Surface Preparation Materials
Prepare your workspace with parchment paper, flour for dusting, and a clean kitchen towel. These simple materials ensure your crusty dutch oven bread releases perfectly and maintains its beautiful shape during baking.
Step-by-Step Mixing and Fermentation Process
Creating the perfect easy no-knead bread recipe requires careful attention to mixing and fermentation. Your no knead rosemary garlic bread journey begins with precise ingredient combination and understanding the magic of slow fermentation.
Start by gathering your ingredients in a large mixing bowl. The key to a successful no-knead bread recipe is minimal handling and maximum patience. Mix your dry ingredients first, ensuring even distribution:
- Flour
- Salt
- Instant yeast
- Finely chopped rosemary
- Minced garlic
Create a well in the center of your dry ingredients. Pour in lukewarm water, using a wooden spoon to gently combine everything. Your goal is a shaggy, sticky dough – don’t overmix. The beauty of this easy no-knead bread recipe is its simplicity.
Cover the bowl with plastic wrap and let the magic of fermentation begin. Room temperature plays a crucial role in developing flavor. Look for these signs of a perfect fermentation:
- Bubbles forming on the surface
- Slight increase in volume
- Distinct yeasty aroma
For your no knead rosemary garlic bread, allow 12-18 hours of slow fermentation. This extended resting time develops deep, complex flavors that transform your bread from ordinary to extraordinary.
Mastering the Art of Herb and Garlic Incorporation
Creating a delicious garlic rosemary artisan bread requires careful consideration of herb and garlic preparation. The right technique can transform your savory no-knead bread from ordinary to extraordinary, infusing it with rich, aromatic flavors that tantalize the taste buds.
Fresh vs. Dried Rosemary Options
When selecting rosemary for your artisan bread, you have two primary choices:
- Fresh rosemary: Provides vibrant, intense flavor with a bright green color
- Dried rosemary: Offers concentrated flavor and longer shelf stability
Fresh rosemary works best when finely chopped to distribute evenly throughout the savory no-knead bread dough. Dried rosemary should be crushed slightly to release its essential oils before incorporation.
Garlic Preparation Techniques
Garlic transforms the flavor profile of your garlic rosemary artisan bread. Consider these preparation methods:
- Minced fresh garlic for sharp, intense flavor
- Roasted garlic for a mellow, sweet undertone
- Garlic powder for consistent distribution
Optimal Timing for Adding Aromatics
The secret to perfectly flavored bread lies in timing. Add rosemary and garlic during the initial mixing stage to ensure even distribution. Be cautious not to overwork the dough, which can impact the bread’s final texture.
Pro tip: For maximum flavor intensity, let the dough rest and ferment with herbs and garlic, allowing the aromatics to fully integrate into the bread’s structure.
Shaping and Second Rise Tips
Perfecting the shape of your no knead rosemary garlic bread requires careful technique and patience. The shaping process transforms your fermented dough into a beautiful artisan loaf that will impress both visually and in taste.
Start by gently turning out your fermented dough onto a lightly floured surface. Your goal is to create a smooth, taut surface without deflating the delicate air bubbles developed during fermentation.
- Use gentle folding motions to create surface tension
- Avoid overworking the rustic homemade bread dough
- Rotate the dough to create an even, round shape
The second rise is crucial for developing flavor and texture in your no knead rosemary garlic bread. During this phase, the dough will become more structured and develop its final form.
| Rise Indicator | Visual Cue | Duration |
|---|---|---|
| Underproofed | Dense, compact appearance | Less than 45 minutes |
| Perfectly Proofed | Slightly puffy, holds shape | 60-90 minutes |
| Overproofed | Flat, loses structure | Over 2 hours |
Pro tip: Test your dough’s readiness by gently poking it with a floured finger. If the indentation slowly springs back, it’s perfectly proofed and ready for baking.
Remember that room temperature and humidity can impact your second rise. Watch your dough closely and adjust timing accordingly to achieve the best results for your rustic homemade bread.
Dutch Oven Baking Methods for the Perfect Crust
Creating a crusty dutch oven bread requires precise baking techniques that transform your easy no-knead bread recipe into a professional-quality loaf. The Dutch oven method unlocks the secret to achieving that crispy, golden exterior home bakers dream about.
Temperature Control Strategies
Successful bread baking starts with understanding temperature dynamics. Preheat your Dutch oven to a scorching 450-475°F before introducing the dough. This high heat creates an instant steam environment that helps develop a spectacular crust.
- Place the empty Dutch oven in the oven during preheating
- Use an oven thermometer to verify accurate temperature
- Allow at least 30 minutes of preheating time
Steam Creation Techniques
Steam is crucial for developing a crispy, shiny crust on your crusty dutch oven bread. When the dough first enters the hot Dutch oven, trapped moisture creates a beautiful exterior.
- Keep the lid closed for the first 25-30 minutes of baking
- Spray water inside the Dutch oven before sealing
- Consider covering dough with a light dusting of flour
Timing Your Lid Removal
Removing the lid at the right moment transforms your easy no-knead bread recipe from good to exceptional. Uncover the Dutch oven during the last 10-15 minutes of baking to achieve a deep golden-brown color and crisp texture.
Pro tip: Watch your bread carefully during the final stages to prevent over-browning.

Storage and Serving Suggestions
Your freshly baked garlic rosemary artisan bread deserves special care to maintain its incredible texture and flavor. Proper storage is crucial for preserving the crusty exterior and soft interior of your rustic homemade bread.
To keep your bread at its best, follow these storage guidelines:
- Store at room temperature in a paper bag for 1-2 days
- Wrap loosely to prevent moisture buildup
- Avoid plastic bags, which can make the crust soggy
For longer storage, consider freezing your garlic rosemary artisan bread. Slice the bread before freezing to make thawing easier. When you’re ready to enjoy, simply reheat in the oven for a few minutes to restore the crispy crust.
| Storage Method | Duration | Best Practices |
|---|---|---|
| Counter | 1-2 days | Paper bag, room temperature |
| Refrigerator | Not recommended | Causes bread to dry out quickly |
| Freezer | Up to 3 months | Slice before freezing |
Serving suggestions can elevate your rustic homemade bread experience. Try these delicious options:
- Serve warm with olive oil and balsamic vinegar
- Use for gourmet sandwiches
- Pair with soups and stews
- Create bruschetta as an appetizer
Pro tip: Revive day-old bread by sprinkling with water and warming in the oven for 5-10 minutes. This trick helps restore the bread’s original texture and brings back its fresh-baked appeal.
Troubleshooting Common Issues
Baking the perfect no knead rosemary garlic bread can be tricky. Even experienced home bakers encounter challenges that can impact the final result. This guide will help you diagnose and resolve common problems to ensure your artisan-style bread turns out delicious every time.
Addressing Dense Texture Problems
A dense, heavy savory no-knead bread often stems from a few key issues:
- Insufficient fermentation time
- Old or inactive yeast
- Incorrect water temperature
- Overmixing or undermixing ingredients
To combat dense texture, ensure your yeast is fresh and active. Proof your yeast by mixing it with warm water and a pinch of sugar. Watch for bubbling, which indicates live yeast. Allow ample time for slow fermentation, typically 12-18 hours at room temperature.
Fixing Flavor Balance
Uneven flavor distribution in no knead rosemary garlic bread can diminish the overall taste experience. Consider these strategies:
- Chop herbs and garlic finely
- Mix aromatics thoroughly into the dough
- Use fresh, high-quality ingredients
Resolving Crust Concerns
Achieving the perfect crust requires precision. Here’s a comparative approach to crust problems:
| Crust Issue | Potential Cause | Solution |
|---|---|---|
| Pale Crust | Low oven temperature | Preheat Dutch oven to 450-500°F |
| Thick, Hard Crust | Excessive baking time | Reduce baking time, monitor closely |
| Soggy Bottom | Insufficient preheating | Ensure Dutch oven is fully heated |
By understanding these troubleshooting techniques, you’ll create consistently delightful savory no-knead bread that impresses everyone at the table.
Conclusion
Creating this easy no-knead bread recipe opens a world of delicious possibilities for home bakers. You’ve learned that making artisan-quality bread doesn’t require professional skills or extensive time commitment. The rustic homemade bread technique we’ve explored provides a straightforward path to achieving bakery-level results right in your own kitchen.
The beauty of this no-knead method lies in its simplicity and flexibility. Whether you’re a beginner or an experienced baker, you can transform basic ingredients into a spectacular loaf that will impress family and friends. Experiment with different herbs, adjust garlic quantities, or explore alternative flour blends to make the recipe truly your own.
Your bread-making adventure doesn’t end here. Each time you bake, you’ll develop more confidence and intuition. The process is about learning, enjoying, and creating something delicious from scratch. We invite you to share your bread-baking experiences, ask questions, and connect with fellow home bakers who are passionate about crafting incredible rustic homemade bread.
Remember, great bread is a journey of discovery. Your kitchen is now your artisan bakery, and every loaf tells a delicious story of creativity and passion. Happy baking!
FAQ
How long does it take to make this no-knead rosemary garlic bread?
The total time is approximately 12-18 hours, with most of that being hands-off fermentation time. The actual active preparation takes about 10-15 minutes, followed by a long, slow fermentation (12-16 hours), shaping (10 minutes), and baking (45-50 minutes).
Can I use dried rosemary instead of fresh?
Yes, you can substitute dried rosemary for fresh. Use about one-third of the amount of dried rosemary compared to fresh. For example, if the recipe calls for 2 tablespoons of fresh rosemary, use about 2 teaspoons of dried rosemary to avoid overwhelming the bread’s flavor.
What type of flour works best for this bread?
Bread flour is ideal for this recipe, as it has a higher protein content that helps develop a better gluten structure. However, you can also use all-purpose flour with good results. For a more rustic texture, consider using a mix of bread flour and whole wheat flour.
How do I know when the dough is properly fermented?
The dough is ready when it appears bubbly, has increased in volume, and looks puffy with a slightly wet and sticky surface. You’ll see small bubbles throughout the dough, and it should have a slightly fermented smell. The surface should look somewhat loose and jiggly when you move the bowl.
Can I make this bread without a Dutch oven?
While a Dutch oven is ideal for creating a crispy crust, you can use alternative methods. Try baking on a preheated pizza stone with a pan of water in the bottom of the oven to create steam. Alternatively, use a heavy baking sheet with a large metal bowl inverted over the bread during the initial baking time.
How long will the bread stay fresh?
The bread is best consumed within 1-2 days. Store it at room temperature in a paper bag or bread box to maintain its crusty exterior. After two days, you can refresh the bread by warming it in the oven for 5-10 minutes at 350°F (175°C).
Can I freeze the bread?
Yes, you can freeze the bread. Wrap it tightly in plastic wrap and then in aluminum foil. Freeze for up to 3 months. Thaw at room temperature and reheat in the oven for best results. It’s best to slice the bread before freezing for easier portioning.
What if my bread turns out too dense?
Dense bread can result from several factors: not enough fermentation time, using too much flour, or not allowing proper rising. Ensure you’re using the correct flour-to-water ratio, let the dough ferment long enough, and avoid adding too much extra flour when handling the dough.
Can I add other herbs or ingredients to this bread?
Absolutely! Feel free to experiment with different herbs like thyme, oregano, or basil. You can also add ingredients like olives, sun-dried tomatoes, or cheese to create your own unique variation of this no-knead bread.
Is this bread suitable for people with dietary restrictions?
The basic recipe is vegetarian and can be made vegan by omitting any dairy. However, it contains gluten, so it’s not suitable for those with celiac disease or gluten sensitivity. For gluten-free alternatives, you’ll need to use a specialized gluten-free flour blend and adjust the recipe accordingly.
Recipes to Try
If you loved this Moist Chocolate Banana Oat Cake, here are more great treats to explore:
- Moist Chocolate Banana Oat Cake – A rich and wholesome cake combining chocolate, banana, and oats for the perfect balance of flavor and texture.
- Quick No-Oven Stovetop Bread – A soft and fluffy homemade bread that requires no oven—perfect for a quick and easy bake.
- Greek Honey Ricotta Pie – A delightful Mediterranean-inspired dessert with a creamy ricotta filling and a touch of honey sweetness.
If you’re looking for even more delicious and creative recipe ideas,
be sure to check out this great resource for inspiration: Sweet Sourdough Bread with Blueberries .
Rustic No-Knead Rosemary Garlic Bread – Crusty, Fragrant & Easy!
- Total Time: 13 hours
- Yield: 1 large loaf
Description
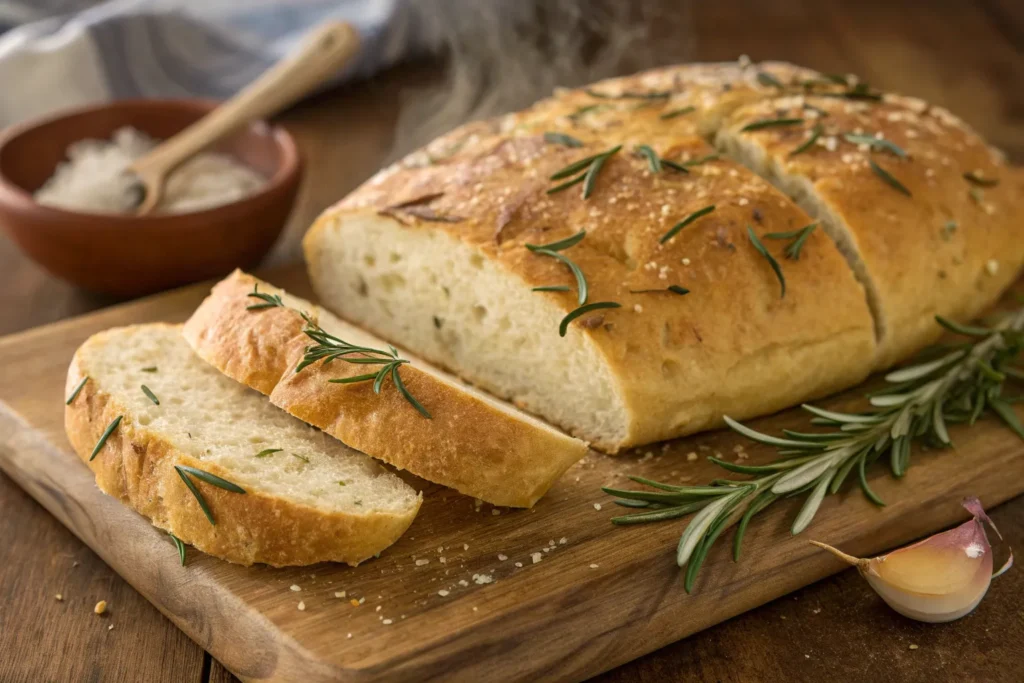
This rustic no-knead rosemary garlic bread is crusty on the outside, soft and fragrant inside – and incredibly easy to make!
Ingredients
-
🧄 3 cloves garlic, minced
-
🌿 1 tablespoon fresh rosemary, chopped
-
🌾 3 cups all-purpose flour
-
🧂 1½ teaspoons salt
-
🍞 ½ teaspoon instant yeast
-
💧 1½ cups warm water
-
🫙 Optional: olive oil for brushing
Instructions
-
🍞 Mixing Bowl
-
🥄 Wooden Spoon
-
🕰️ Proofing Towel
-
🔪 Bread Knife
-
🔥 Dutch Oven
-
👩🍳 Oven Mitts
-
🧂 Measuring Spoons
Notes
For best results, use fresh rosemary and let the dough rise undisturbed. No Dutch oven? Use any oven-safe pot with a lid.
- Prep Time: 10 minutes
- Cook Time: 45 minutes
- Category: Baking
- Method: Baking
- Cuisine: Rustic
Nutrition
- Serving Size: 1 slice
- Calories: 140
- Sugar: 0g
- Sodium: 290mg
- Fat: 2g
- Saturated Fat: 0.3g
- Unsaturated Fat: 1.5g
- Trans Fat: 0g
- Carbohydrates: 26g
- Fiber: 1g
- Protein: 4g
- Cholesterol: 0mg
Keywords: bread, no-knead, rosemary, garlic, artisan, easy