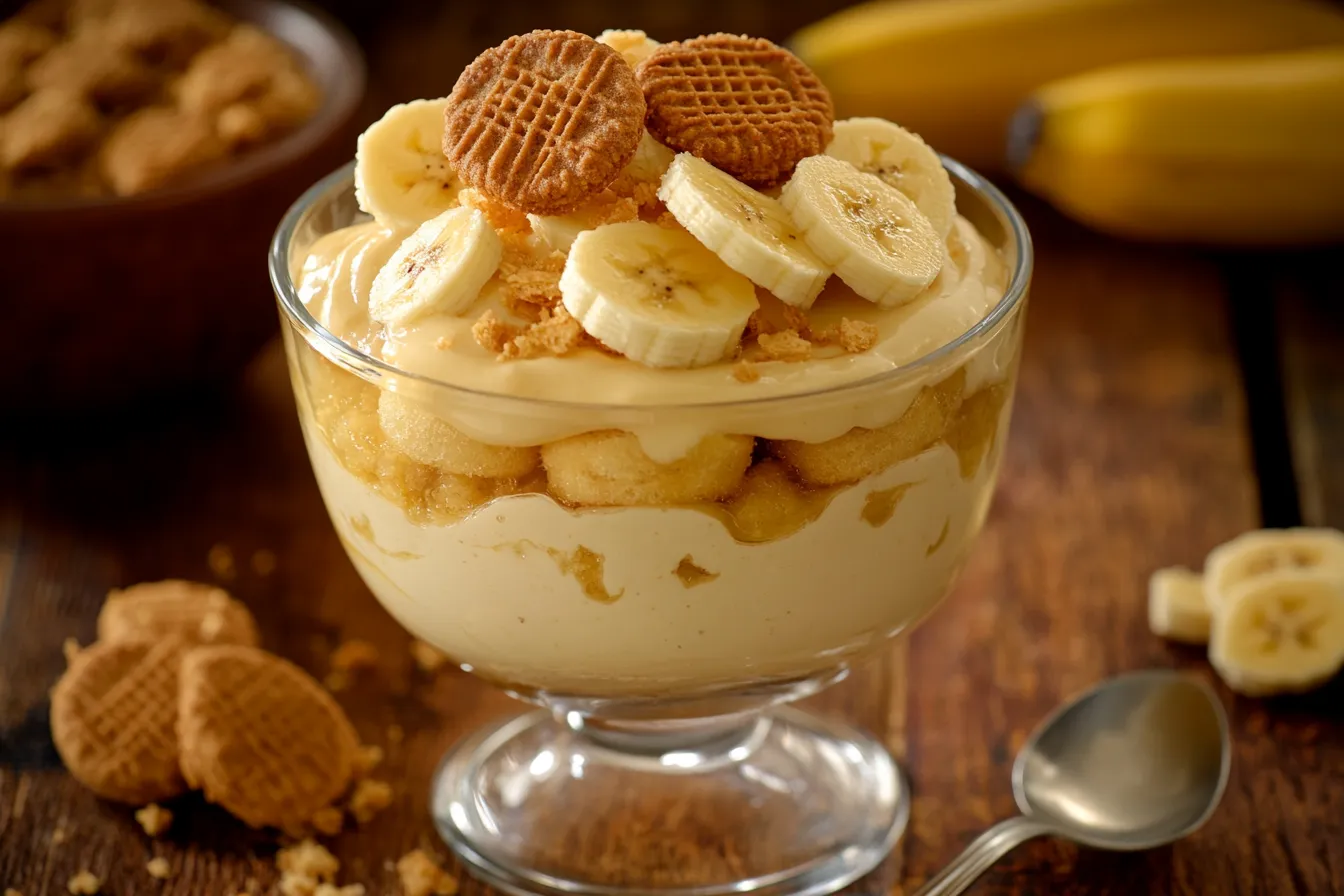
Looking for an irresistible dessert? Try Not Yo Mama’s Banana Pudding, a rich, creamy twist on classic banana pudding. It’s an easy, no-bake treat perfect for gatherings or whenever you crave something special. Say goodbye to ordinary desserts and hello to a deliciously indulgent experience!
This dessert is so rich and decadent, it steals the show at any event. It’s not just another pudding; it’s a gourmet experience. With just a few simple ingredients and easy steps, you’ll make a dessert that looks and tastes like it’s from a fancy restaurant.
Key Takeaways
- Discover a revolutionary twist on classic banana pudding
- Learn an easy banana pudding recipe that impresses every time
- Create a creamy dessert with minimal cooking skills
- Transform simple ingredients into a gourmet treat
- Perfect for family gatherings and potluck events
- Achieve restaurant-quality dessert at home
Why This Banana Pudding Recipe Is Different
Get ready to change your dessert game with a banana pudding that defies tradition. Our no-bake banana dessert turns the classic Southern treat into a quick, easy masterpiece. It’s so good, everyone will want seconds.
Breaking Down the Traditional Boundaries
Traditional banana pudding with vanilla wafers often needs baking and is hard to make. Our version is simple and still has the creamy flavors you love. The main differences are:
- No oven needed for this no-bake banana dessert
- Faster to make
- Simpler ingredients
- Better flavor
What Sets This Recipe Apart
The magic of this banana pudding is in its new approach. We’ve made a recipe that’s full of flavor but easy to make. The secret is in how we layer the ingredients and balance the flavors.
| Traditional Method | Our Innovative Approach |
|---|---|
| Baked preparation | No-bake technique |
| Limited flavor complexity | Layered flavor dimensions |
| Time-consuming process | Quick and easy preparation |
Flavor Elements That Elevate the Dessert
Our banana pudding with vanilla wafers is more than a dessert—it’s an experience. We’ve picked ingredients that work well together, creating a harmonious blend of textures and tastes. The vanilla wafers add a nice crunch, and the creamy pudding is smooth.
“Not just a dessert, but a celebration of simplicity and flavor!” – Dessert Enthusiasts
Whether you’re a busy home cook or a dessert lover, this banana pudding recipe is perfect. It’s easy to make and packed with flavor. Impress your friends and family with minimal effort and lots of taste.
Essential Ingredients for Perfect Banana Pudding
To make the best banana pudding, pick the right ingredients. Your banana pudding with vanilla wafers will be amazing if you choose each part carefully.
- Fresh Bananas: Choose ripe, yellow bananas with a few brown spots for the best sweetness
- High-quality vanilla wafers (preferably Nilla brand)
- Instant vanilla pudding mix
- Sweetened condensed milk
- Cold heavy cream
- Cream cheese
The secret to this dessert is using top-notch ingredients. Ripe bananas add natural sweetness. Cream cheese brings a rich, tangy taste to your banana pudding with vanilla wafers.
| Ingredient | Quantity | Purpose |
|---|---|---|
| Ripe Bananas | 3-4 medium | Natural sweetness and texture |
| Vanilla Wafers | 1 box | Crunchy layer and classic flavor |
| Instant Vanilla Pudding | 1 package | Creamy base |
| Sweetened Condensed Milk | 1 can | Rich sweetness |
Pro tip for your easy banana pudding recipe: Use room temperature ingredients. This ensures smooth mixing and the best flavor blending.
Kitchen Tools and Equipment Needed
Making a tasty no-bake banana dessert needs some basic kitchen tools. Whether you’re experienced or new to cooking, the right tools make this creamy banana dessert easy to make.
Essential Utensils for Your Banana Pudding
To make the perfect creamy banana dessert, you’ll need a few key tools:
- Large mixing bowl for combining ingredients
- Whisk or electric mixer for smooth preparation
- Measuring cups and spoons for precise ingredients
- Sharp knife for slicing bananas
- Cutting board
Optional Tools to Elevate Presentation
These tools are not necessary but can make your no-bake banana dessert look amazing:
- Trifle dish for layered presentation
- Piping bag for decorative cream topping
- Glass serving dishes to showcase layers
- Offset spatula for smooth layering
Recommended Storage Containers
Keep your creamy banana dessert fresh with the right storage:
- Airtight glass container with lid
- Plastic container with secure seal
- Disposable pudding containers for easy transport
Getting these tools will make your no-bake banana dessert look and taste like a pro. It will also make cooking in your kitchen fun and easy.
Not Yo Mama’s Banana Pudding Step-by-Step Guide
Making this banana pudding recipe is easier than you think. With a few simple steps, you’ll make a creamy banana dessert that will wow everyone.
- Prepare Your Ingredients Get all your ingredients ready. Make sure your bananas are ripe but not too ripe for the best taste and texture.
- Create the Creamy Base Mix together instant vanilla pudding mix, condensed milk, and cold milk until it’s smooth. This makes the creamy base of your banana pudding.
- Layer with Precision Begin with a layer of vanilla wafers, then add sliced bananas, and finally pour the pudding mixture. Keep repeating these layers for the best flavor.
- Chill and Set Put the dessert in the fridge for at least 4 hours. This lets the flavors mix well and the wafers get soft.
For the best creamy banana dessert, remember these tips:
- Choose fresh, high-quality ingredients
- Cut bananas just before you start to prevent them from turning brown
- Don’t overmix the pudding base
| Preparation Step | Time Required | Difficulty |
|---|---|---|
| Ingredient Preparation | 10 minutes | Easy |
| Mixing Pudding | 5 minutes | Easy |
| Layering | 10 minutes | Medium |
| Chilling | 4-6 hours | Hands-off |
Your banana pudding recipe is ready! You’ll have a creamy banana dessert that’s sure to be a hit with your family.
Tips for Selecting and Preparing Bananas
Creating the perfect no-bake banana dessert starts with choosing the right bananas. Your banana pudding with vanilla wafers depends on selecting and preparing bananas that will deliver maximum flavor and texture.
Banana Ripeness Decoded
When making banana pudding, banana selection is crucial. Look for bananas with these characteristics:
- Bright yellow with few brown spots
- Slightly soft when gently pressed
- Ripe but not overly mushy
- No green areas or completely black skin
Precision Slicing Techniques
Slicing bananas for your no-bake banana dessert requires careful technique. Use these professional tips:
- Use a sharp, clean knife
- Slice bananas immediately before adding to pudding
- Cut into uniform 1/4-inch thick rounds
- Aim for consistent slice thickness
Preventing Banana Browning
Keep your banana pudding with vanilla wafers looking fresh by preventing browning. Quick tricks include:
- Coat sliced bananas in lemon juice
- Use citric acid solution
- Minimize exposure to air
- Add bananas just before serving
Mastering these banana preparation techniques will elevate your dessert from good to extraordinary. It ensures a delightful no-bake banana dessert that impresses every time.
Storage and Make-Ahead Instructions
Keeping your creamy banana dessert fresh is important. You can do this with the right storage methods.
Refrigeration is crucial for the taste and texture of your banana pudding. Store it in an airtight container. This keeps it fresh and prevents bad smells from getting in.
- Refrigerate within 2 hours of preparation
- Use a sealed glass or plastic container
- Place plastic wrap directly on the pudding surface to prevent skin formation
The shelf life of your banana pudding depends on its ingredients. A pudding with fresh ingredients stays good for 3-4 days in the fridge.
| Storage Method | Recommended Duration | Quality Preservation |
|---|---|---|
| Refrigerated (Covered) | 3-4 days | Excellent |
| Room Temperature | 2 hours max | Not recommended |
Freezing your banana pudding isn’t a good idea. The texture of bananas and cream can change, making it less tasty. It’s best to enjoy it within the recommended time frame.
Always check for signs of spoilage before serving. Look for unusual odors or mold. If you’re unsure, it’s best to throw it away and make a new batch.
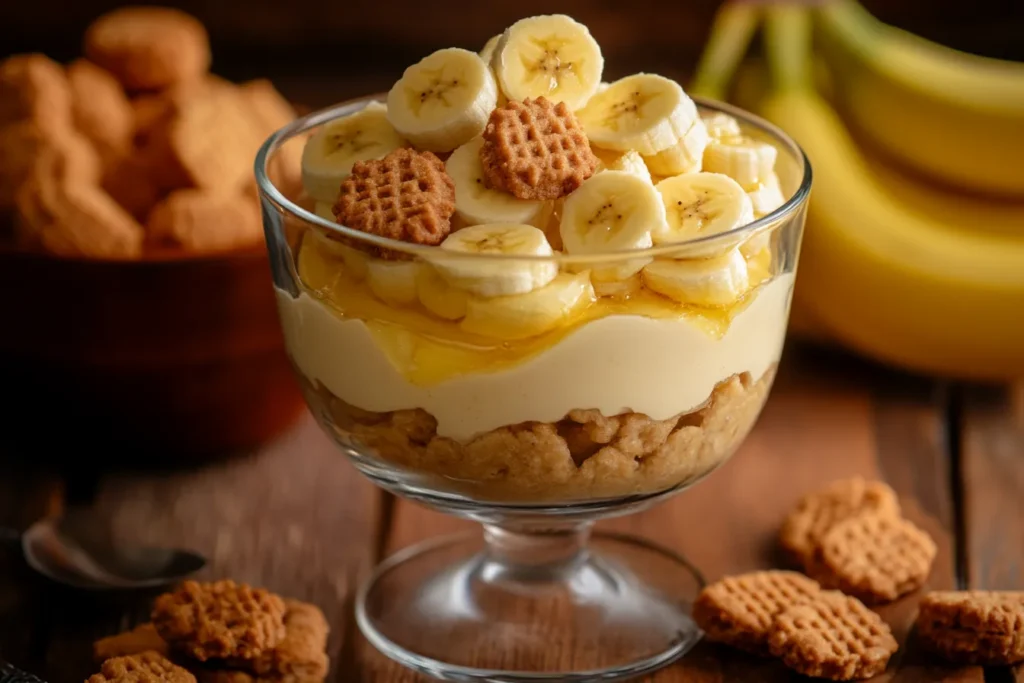
Serving Suggestions and Variations
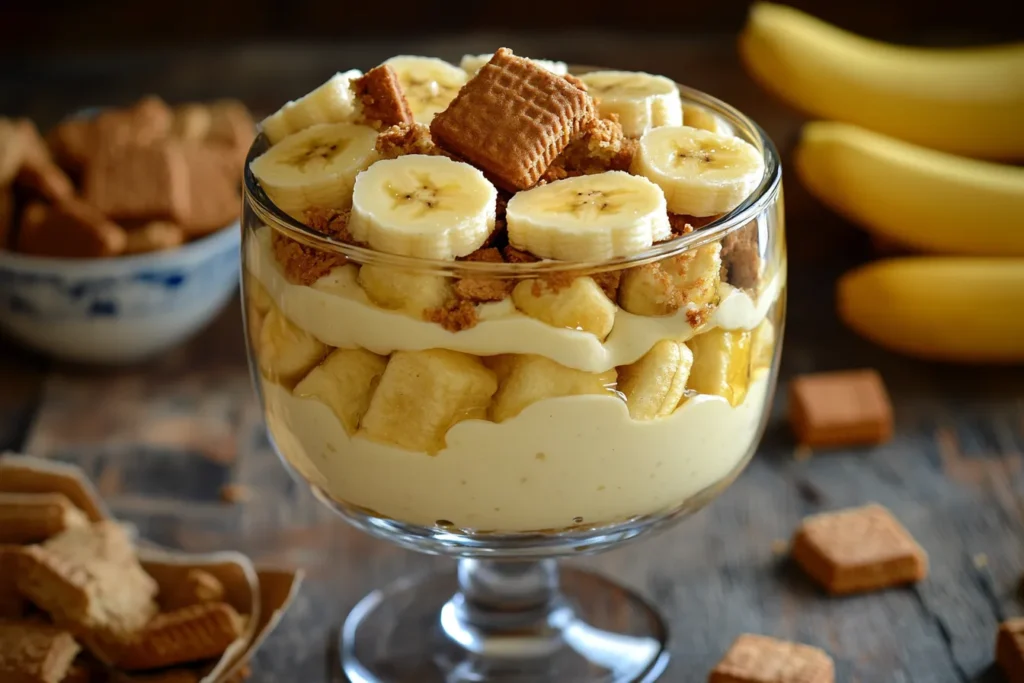
Your banana pudding with vanilla wafers is sure to impress! This no-bake banana dessert can be made even better with a few creative ideas. Let’s look at some ways to make your dessert stand out.
Presentation Ideas That Wow
How you present your banana pudding can make it a real showstopper. Here are some ideas to make your dessert look amazing:
- Individual mason jars for a rustic charm
- Clear glass trifle dishes to showcase layers
- Elegant parfait glasses for a sophisticated look
- Large family-style serving bowl for casual gatherings
Creative Toppings to Enhance Flavor
Take your no-bake banana dessert to the next level with these tasty toppings:
- Crunchy additions: Toasted coconut flakes
- Chocolate shavings or mini chips
- Caramel drizzle
- Crushed vanilla wafers for extra texture
- Fresh mint leaves for a pop of color
Dietary Modifications
Make your banana pudding with vanilla wafers fit different diets:
- Gluten-free: Use gluten-free vanilla wafers
- Dairy-free: Substitute milk with coconut or almond milk
- Vegan: Use plant-based pudding mix and whipped topping
- Low-sugar: Select sugar-free pudding mix
Try out these ideas to make your no-bake banana dessert your own. This recipe is great because it’s easy to change and loved by everyone.
Conclusion
Your journey through this easy banana pudding recipe ends with a sweet promise. This Not Yo Mama’s Banana Pudding is more than just a dessert. It’s a creamy banana treat that makes the classic even better.
By following the steps and tips in this recipe, you’ll see how simple ingredients can make a masterpiece. This banana pudding is easy to make and has rich, comforting flavors. It’s perfect for both new and experienced cooks.
We encourage you to become your own dessert chef and make this recipe in your kitchen. Share it with friends and family, and enjoy their reactions. Your special touch will make it unforgettable.
Remember, great recipes are meant to be shared and celebrated. Your banana pudding adventure is just starting. So, grab your ingredients, get creative, and enjoy every delicious moment.
FAQ
How long can I store Not Yo Mama’s Banana Pudding in the refrigerator?
You can keep this creamy banana dessert in the fridge for 3-4 days. Use plastic wrap to cover it. This helps keep the bananas from turning brown too fast.
Can I make this banana pudding ahead of time?
Yes, you can! This no-bake banana dessert is great for making ahead. Make it up to 24 hours before, but add the vanilla wafers just before serving. This keeps them crunchy.
What are some variations I can try with this banana pudding recipe?
Try different toppings like crushed graham crackers, chocolate shavings, or cinnamon. For a dairy-free version, use coconut milk pudding mix. You can also add a chocolate pudding layer for extra richness.
How do I prevent the bananas from turning brown?
To stop browning, slice bananas just before making the pudding. Toss them in lemon juice. This recipe works best with ripe but not too ripe bananas.
Is this recipe gluten-free?
The traditional recipe isn’t gluten-free because of vanilla wafers. But, you can make it gluten-free by using gluten-free vanilla wafers or graham crackers.
Can I freeze Not Yo Mama’s Banana Pudding?
You can freeze the pudding, but the bananas and wafers might change texture when thawed. Enjoy it fresh for the best taste and texture.
What type of bananas work best for this recipe?
Use ripe, yellow bananas with a few brown spots. They’ll be sweet and soft, making the pudding layers extra flavorful.
More Recipes to Try
If you loved this Moist Chocolate Banana Oat Cake, here are more great treats to explore:
- Moist Chocolate Banana Oat Cake – A rich and wholesome cake combining chocolate, banana, and oats for the perfect balance of flavor and texture.
- Quick No-Oven Stovetop Bread – A soft and fluffy homemade bread that requires no oven—perfect for a quick and easy bake.
- Greek Honey Ricotta Pie – A delightful Mediterranean-inspired dessert with a creamy ricotta filling and a touch of honey sweetness.
If you’re looking for even more delicious and creative recipe ideas,
be sure to check out this great resource for inspiration: cheesecake and cookies.
Not Yo Mama’s Banana Pudding – Easy Creamy Dessert Recipe
- Total Time: 4 hours 15 minutes (including chilling time)
- Yield: 8 servings
Description
A rich and creamy banana pudding layered with vanilla wafers, fresh bananas, and a luscious pudding mixture. A no-bake classic dessert that’s always a crowd-pleaser!
Ingredients
- Fresh bananas (ripe but firm)
- Vanilla pudding mix (instant)
- Sweetened condensed milk
- Cream cheese (softened)
- Whipped topping (such as Cool Whip)
- Vanilla wafers or shortbread cookies
- Milk (cold, for pudding)
Instructions
- Large mixing bowls
- Electric mixer (hand mixer or stand mixer)
- Rubber spatula
- Glass serving dish or trifle bowl (for layering)
- Measuring cups and spoons
Notes
For best results, use ripe but firm bananas to prevent them from becoming too mushy. This pudding is even better the next day after chilling overnight!
- Prep Time: 15 minutes
- Cook Time: 0 minutes
- Category: Dessert
- Method: No-Bake
- Cuisine: American
Nutrition
- Serving Size: 1 slice
- Calories: 350
- Sugar: 32g
- Sodium: 250mg
- Fat: 18g
- Saturated Fat: 10g
- Unsaturated Fat: 6g
- Trans Fat: 0g
- Carbohydrates: 42g
- Fiber: 2g
- Protein: 4g
- Cholesterol: 45mg
Keywords: banana pudding, no bake dessert, easy pudding, creamy banana dessert